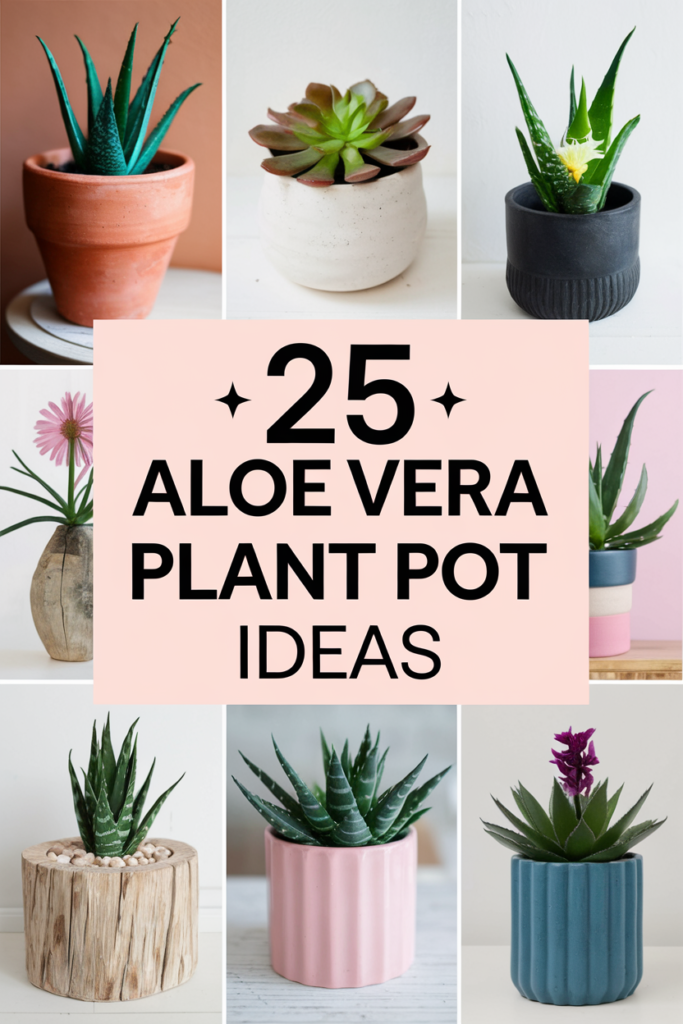
Adding a touch of greenery to your space can be as simple as incorporating some charming aloe vera plants. This versatile succulent not only purifies the air but also looks absolutely fabulous in various pot styles. Here are 25 creative pot ideas to showcase your aloe vera that will brighten up any corner of your home or garden.
Diy Mosaic Aloe Vera Plant Pot Idea: Decorate A Pot With Colorful Tiles For A Unique Touch.

Creating a DIY mosaic pot for your Aloe Vera plant is a fun and engaging way to add a splash of color to your space. Not only does it enhance the look of your indoor succulent, but it also shows off your creative side. The process is simple and can be customized to fit your style, making it a perfect project for both beginners and seasoned crafters alike.
The beauty of this project lies in the combination of vibrant tiles and the natural elegance of the Aloe Vera plant. You can easily match the colors of the tiles to the decor of your home. This mosaic pot not only serves as a decorative piece but also provides a cozy home for your Aloe plant, which is known for its air-purifying qualities and easy care. Now, let’s dive into a refreshing recipe that pairs perfectly with your beautifully decorated pot.
Ingredients
- 2 cups fresh Aloe Vera leaves
- 1 tablespoon honey
- 1 cup yogurt
- 1/2 cup coconut milk
- 2 tablespoons lime juice
- Ice cubes
Instructions
- Prepare the Aloe Vera: Cut the fresh Aloe Vera leaves and scoop out the gel inside. Make sure to avoid any green parts, as they can be bitter.
- Blend Ingredients: In a blender, combine the Aloe gel, honey, yogurt, coconut milk, and lime juice. Blend until smooth.
- Serve Chilled: Add ice cubes to the mixture and blend again until frothy. Pour into glasses and enjoy a refreshing Aloe smoothie!
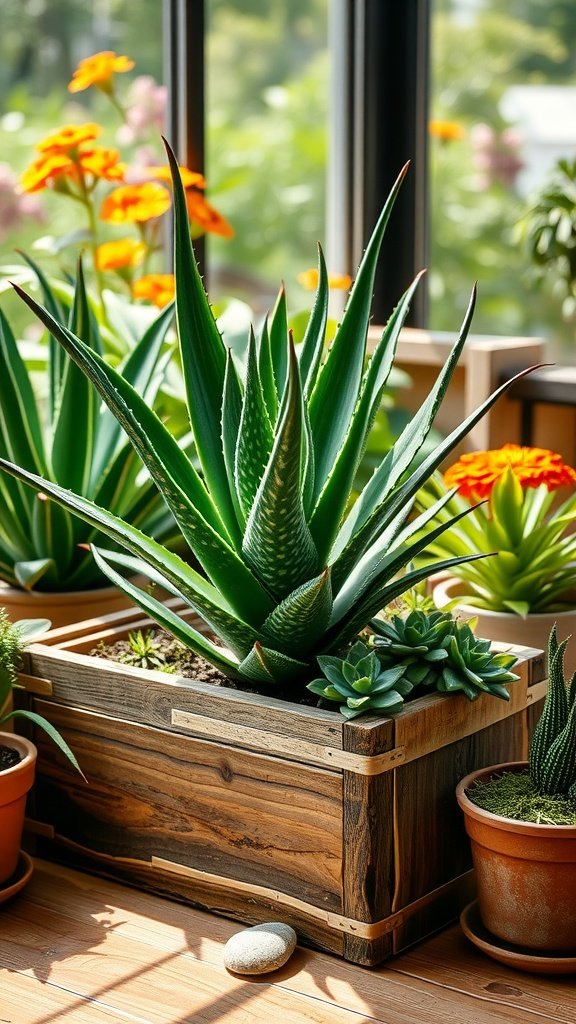
Rustic Aloe Vera Plant Pot Idea: Use A Wooden Crate For A Charming Farmhouse-Inspired Look.
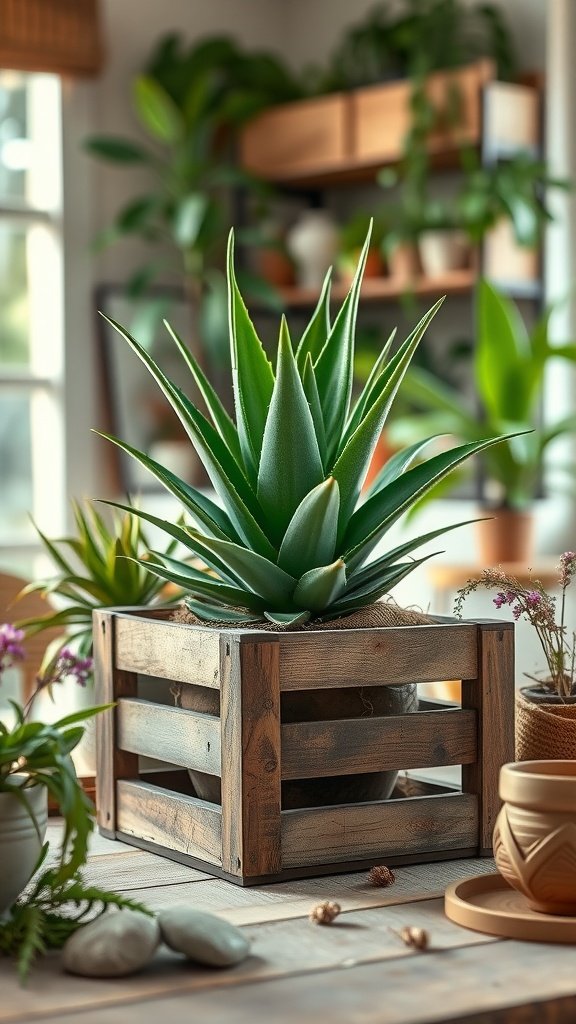
Creating a rustic centerpiece for your home using an Aloe Vera succulent can be both easy and rewarding. The earthy tones of a wooden crate combined with the vibrant green of the Aloe Vera plant make for a beautiful, farmhouse-inspired decoration. This simple project adds charm and a touch of nature to any space, perfect for those who appreciate the cozy feel of rustic decor.
To style your wooden crate, start by ensuring your Aloe Vera plant is healthy and ready for display. You can enhance your plant care routine by considering the right watering schedule and light conditions. Caring for your Aloe Vera plant is straightforward, making this project perfect for both seasoned gardeners and beginners alike. Now, let’s dive into a quick recipe for a refreshing Aloe Vera smoothie that highlights the benefits of this wonderful plant!
Ingredients
- 1 cup fresh Aloe Vera gel (from the Aloe Vera plant)
- 1 banana
- 1/2 cup spinach (optional)
- 1 cup almond milk (or any milk of choice)
- 1 tablespoon honey or maple syrup (to taste)
- 1 tablespoon chia seeds (optional)
- Ice cubes (as needed)
Instructions
- Prepare the Aloe Vera: Carefully cut open a leaf of the Aloe Vera plant. Scoop out the gel using a spoon, avoiding the skin and any yellow latex.
- Blend Ingredients: In a blender, combine the Aloe Vera gel, banana, spinach, almond milk, honey, and chia seeds. Blend until smooth.
- Adjust Consistency: If the smoothie is too thick, add more almond milk until you reach your desired consistency.
- Serve: Pour the smoothie into a glass, add ice cubes if desired, and enjoy a nutritious drink!
Hanging Aloe Vera Plant Pot Idea: Place Your Plant In A Macramé Hanger For A Space-Saving Display.
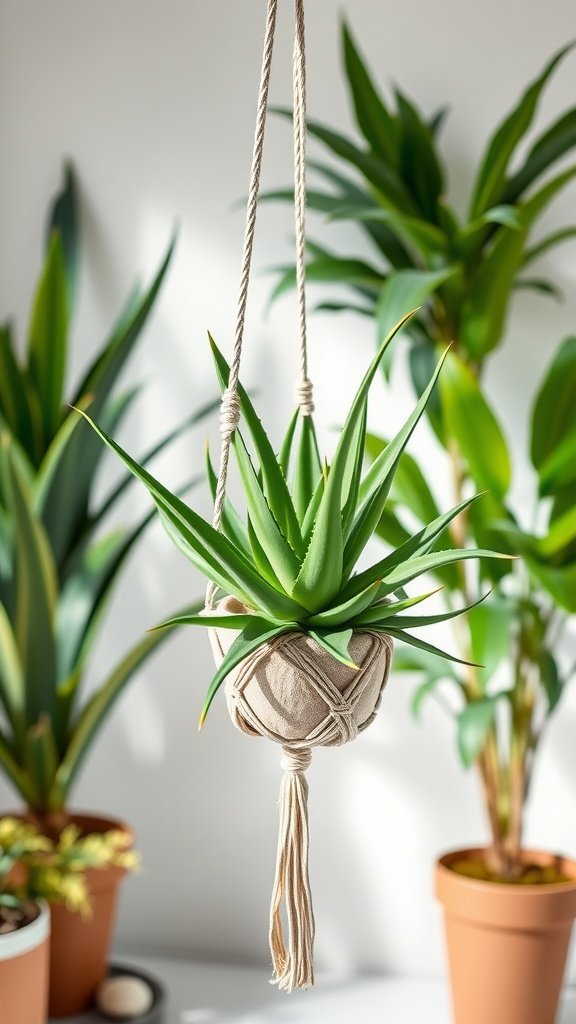
Introducing a charming way to showcase your Aloe Vera plants while saving space: the macramé hanger! This trendy option adds a touch of boho elegance to any room, and it’s perfect for those who love indoor gardening. The Aloe Vera plant is not only visually appealing but also brings a host of benefits, including air purification and soothing properties for skin ailments.
Using a macramé hanger allows your plant to thrive while creating a unique display. You’ll find it’s simple to set up and maintain. Just ensure your indoor Aloe Vera plant gets plenty of indirect sunlight and infrequent watering to keep it happy. Now, let’s get into a refreshing recipe featuring this incredible succulent!
Ingredients
- 2-3 fresh Aloe Vera leaves
- 1 cup coconut water
- 1 tablespoon honey (optional)
- 1/2 cup fresh pineapple chunks
- 1/2 teaspoon lime juice
Instructions
- Harvest Aloe Vera: Carefully trim the Aloe Vera leaves from your plant, ensuring to cut close to the base. Rinse them under cold water.
- Extract Gel: Cut the leaves lengthwise to expose the clear gel inside. Scoop the gel out with a spoon and place it in a blender.
- Blend Ingredients: Add coconut water, honey, pineapple chunks, and lime juice to the blender. Blend until smooth.
- Serve: Pour into a glass and enjoy immediately for a refreshing drink that nourishes and hydrates!
Vintage Aloe Vera Plant Pot Idea: Repurpose A Teacup Or Old Kettle As A Whimsical Pot.

Creating a charming plant display by repurposing an old teacup or kettle is a fun and creative way to showcase your Aloe Vera plant. This project is simple, making it perfect for gardeners and DIY enthusiasts alike. The unique design not only adds character to your indoor garden, but it also emphasizes the beauty of the Aloe Vera succulent, known for its soothing properties and easy care requirements.
When planting your Aloe Vera in a vintage teacup or kettle, ensure that there are drainage holes for excess water. This will help prevent overwatering, which is crucial for Aloe plant care. Consider adding a bit of decorative gravel to the bottom before planting to aid drainage. A mix of cactus soil works wonderfully for these sturdy plants. Don’t forget to place your whimsical pots in a bright spot to keep your Aloe happy!
Ingredients
- 1 Aloe Vera plant
- 1 vintage teacup or old kettle
- Cactus potting soil
- Decorative gravel
- Small rocks or pebbles (optional)
Instructions
- Choose your vintage teacup or kettle and ensure it’s clean. If using a kettle, make sure there’s a drainage hole.
- Add a layer of decorative gravel at the bottom for better drainage.
- Fill the container with cactus potting soil, leaving enough room for the Aloe Vera plant.
- Carefully remove your Aloe Vera from its original pot and place it in the teacup or kettle. Fill in around the plant with additional soil.
- Water lightly and place the pot in a sunny spot. Regularly check for moisture and follow succulent care tips to maintain your Aloe Vera.
Chalkboard Aloe Vera Plant Pot Idea: Paint A Pot With Chalkboard Paint To Customize With Messages.

Transform your space with a chalkboard-painted pot for your Aloe Vera plant! This fun and creative project lets you personalize your plant container, making it not only a home for your Aloe but also a canvas for your messages. You can write care reminders, seasonal greetings, or even fun quotes. The chalkboard surface allows you to change things up whenever you want, adding a lively touch to your indoor gardening.
This project is simple and perfect for both beginners and seasoned crafters. Plus, caring for your Aloe Vera plant is easy! These succulents thrive indoors with minimal care. Just remember to provide good drainage and bright, indirect sunlight. If you’re curious about how to propagate aloe or care for aloe leaves, this project enhances your plant life in a stylish way.
Ingredients
- 1 terracotta or ceramic pot
- Chalkboard paint
- Chalk or chalk markers
- Aloe Vera plant
- Potting soil
- Small stones for drainage
Instructions
- Choose your pot and clean it thoroughly to remove any dust or residue.
- Apply chalkboard paint evenly on the exterior of the pot, ensuring to cover all visible areas. Allow it to dry completely according to the paint instructions.
- Once dry, plant your Aloe Vera in the pot with a layer of small stones at the bottom for drainage, followed by potting soil.
- Use chalk or chalk markers to write messages or reminders on the chalkboard surface. Feel free to change them as needed!
- Place your beautiful new pot in a spot with plenty of indirect sunlight and enjoy your personalized Aloe Vera display.
Minimalist Aloe Vera Plant Pot Idea: Use A Plain White Ceramic Pot For A Clean, Modern Vibe.

Using a plain white ceramic pot for your Aloe Vera plant creates a stunning minimalist aesthetic that complements any space. This simple choice not only highlights the natural beauty of the succulent but also provides a modern vibe that fits effortlessly into various interior styles. The clean lines of the pot draw attention to the vibrant green leaves of the Aloe, making it a perfect statement piece for your indoor gardening collection.
Taking care of your Aloe Vera involves minimal effort, making it an ideal choice for both beginner and seasoned plant lovers. With proper care, like ensuring it gets enough sunlight and following guidelines on how to trim Aloe Vera plants, you can enjoy the benefits of its soothing gel right at home. Now, let’s dive into a delightful recipe that features Aloe Vera!
Ingredients
- 1 large Aloe Vera leaf
- 2 cups coconut water
- 1 tablespoon honey (optional)
- 1 tablespoon lime juice
- Ice cubes
Instructions
- Harvest the Aloe: Carefully cut a large leaf from your Aloe Vera plant. Trim the edges and wash it thoroughly.
- Extract the Gel: Slice the leaf open and scoop out the clear gel into a blender.
- Blend the Ingredients: Add the coconut water, honey, and lime juice to the blender. Blend until smooth.
- Serve: Pour the mixture over ice in a glass. Enjoy your refreshing Aloe Vera drink!
Boho Aloe Vera Plant Pot Idea: Wrap A Pot With Jute Or Burlap And Add Decorative Beads.

This Boho-inspired aloe vera plant pot is a charming way to showcase your indoor aloe plant. Wrapping a pot with jute or burlap not only enhances its natural beauty but also adds a rustic touch to your home decor. It’s a simple and enjoyable DIY project that anyone can tackle, making it perfect for plant lovers who appreciate a personal touch.
Once you’ve completed this project, your aloe vera will thrive in style. Remember to regularly check your plant’s needs with proper aloe vera plant care—like ensuring it gets adequate sunlight and water. And if you’re wondering what to do with those aloe leaves, they can be harvested for their soothing gel, perfect for skin care! Now, let’s move on to a delicious recipe to complement your gardening efforts.
Ingredients
- 2 cups fresh aloe vera leaves, peeled and diced
- 1 tablespoon honey
- 1 tablespoon lemon juice
- 1 cup coconut water
- Ice cubes (optional)
Instructions
- Prepare the Aloe: First, carefully peel and dice the fresh aloe vera leaves, ensuring to remove any yellow parts that may be bitter.
- Blend the Ingredients: In a blender, combine the diced aloe vera, honey, lemon juice, and coconut water. Blend until smooth.
- Serve: Pour the mixture into a glass, adding ice cubes if desired. Enjoy it as a refreshing drink packed with nutrients!
Concrete Aloe Vera Plant Pot Idea: Create Your Own Pot With A Diy Concrete Mold For Durability.
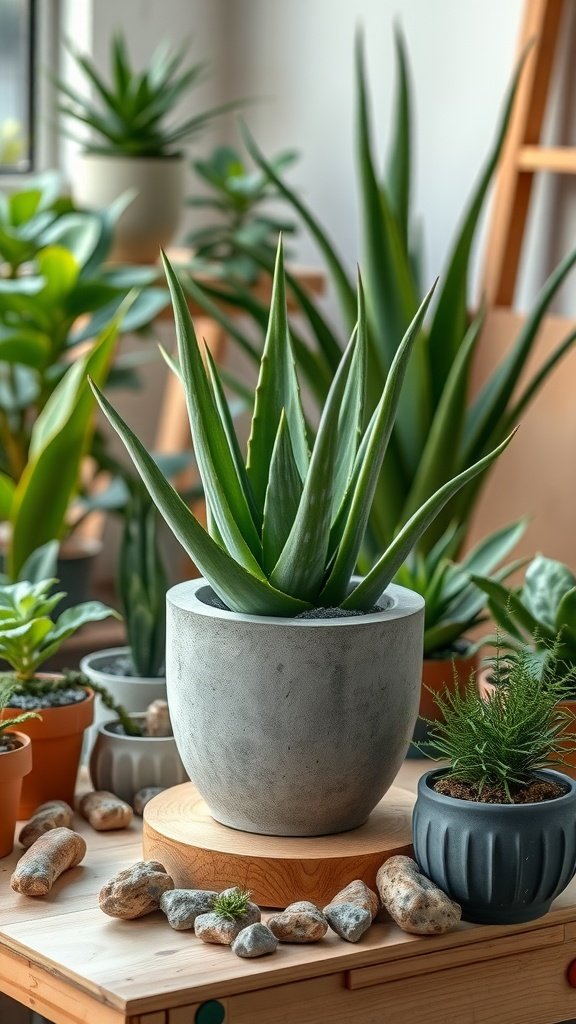
Creating a DIY concrete pot for your aloe vera plant is both fun and practical. Not only does concrete provide excellent durability, but it also offers a modern aesthetic that complements the natural beauty of the aloe plant. This project is straightforward, making it perfect for beginners and experienced DIY enthusiasts alike.
With just a few materials, you can craft a sturdy home for your aloe vera succulent. This not only enhances your indoor gardening space but also provides the ideal environment for your plant to thrive. Plus, it’s a great conversation starter! Once your pot is ready, remember to consider some essential care tips for your aloe plant, like knowing how to replant and propagate it for future projects.
Ingredients
- 1 bag of concrete mix
- Water (as per concrete mix instructions)
- Plastic container or mold (for shaping the pot)
- Cooking spray (for easy mold release)
- Sand or gravel (for drainage)
- Decorative stones (optional, for aesthetic purposes)
Instructions
- Prepare Your Mold: Spray the inside of your plastic container with cooking spray to ensure easy release once the concrete sets.
- Mix Concrete: In a large bowl, mix the concrete according to package instructions, ensuring a smooth consistency.
- Pour Concrete: Fill the prepared mold with the concrete mix, leaving space at the top for drainage materials.
- Add Drainage: Once filled, add a layer of sand or gravel to the top for drainage, then level it out.
- Let It Set: Allow the concrete to cure for 24-48 hours, depending on the mix instructions.
- Remove from Mold: Carefully remove the concrete pot from the mold after it’s fully cured.
- Add Your Aloe Plant: Fill the pot with potting soil and plant your aloe vera, ensuring it’s well positioned and stable.
- Decorate: Optionally, add decorative stones on top of the soil to enhance the visual appeal.
Upcycled Aloe Vera Plant Pot Idea: Turn An Old Tin Can Into A Charming, Eco-Friendly Pot.

Transforming an old tin can into a stylish plant pot is a fun and eco-friendly way to showcase your aloe vera plant. This project is simple and affordable, making it perfect for anyone looking to add a touch of greenery to their home. The clean, fresh taste of aloe vera not only brightens your space but brings some health benefits as well. Plus, it’s a great way to practice sustainable living.
When caring for your aloe plant, remember a few essential tips. Start with proper drainage by creating holes at the bottom of the tin can. Use well-draining soil to avoid root rot. As you nurture your aloe, keep in mind the importance of sunlight and watering. Now that you’re inspired to create your charming tin can pot, here’s a delicious recipe for a refreshing aloe vera juice that complements your gardening efforts.
Ingredients
- 2 aloe vera leaves
- 1 cup water
- 1 tablespoon honey (optional)
- 1/2 lemon, juiced
Instructions
- Harvest Aloe: Cut the aloe vera leaves from the plant. Wash them thoroughly.
- Extract Gel: Slice the leaves open and scoop out the clear gel using a spoon.
- Blend: In a blender, combine the aloe gel, water, honey, and lemon juice. Blend until smooth.
- Serve: Pour into a glass and enjoy your refreshing aloe vera juice!
Painted Aloe Vera Plant Pot Idea: Personalize A Terracotta Pot With Vibrant Acrylic Paints.
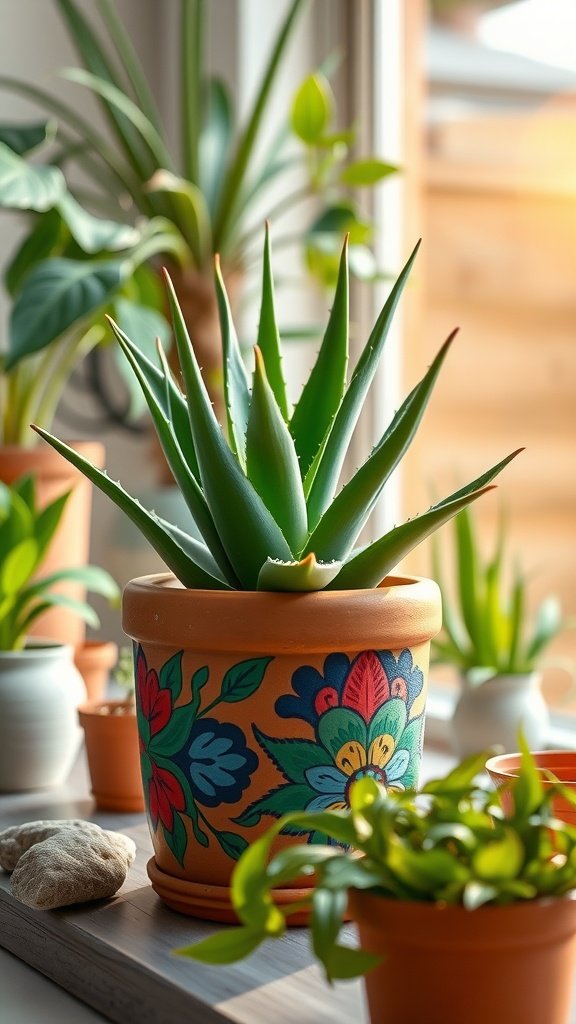
Transforming a simple terracotta pot into a vibrant masterpiece is not just a fun DIY project; it also adds a personal touch to your indoor garden. Using acrylic paints, you can create beautiful designs that reflect your personality while providing a charming home for your aloe vera plant.
This project is straightforward and enjoyable, making it perfect for both beginners and seasoned crafters. The resulting pot will not only showcase your aloe plant but also brighten any space it occupies.
Ingredients
- 1 terracotta pot
- Acrylic paints in various colors
- Paintbrushes (various sizes)
- Water for cleaning brushes
- Palette for mixing colors
- Sealant (optional, for durability)
Instructions
- Prepare the Pot: Start with a clean terracotta pot. Ensure it’s dry and free from dust.
- Plan Your Design: Sketch out your design on paper or directly on the pot with a pencil. This could be floral patterns, geometric shapes, or any design you like.
- Paint the Base: Using a larger brush, apply a base coat of your chosen color. Let it dry completely before moving on.
- Add Details: Use smaller brushes to add detailed designs and patterns. Layer different colors for a more dynamic look.
- Finishing Touches: Once the paint is dry, apply a sealant for extra protection if desired. This will help preserve your artwork.
- Plant Your Aloe: Once everything is set, carefully replant your aloe vera in the newly decorated pot, ensuring the plant has enough room to grow.
Geometric Aloe Vera Plant Pot Idea: Use A Geometric-Shaped Pot To Give A Contemporary Touch.
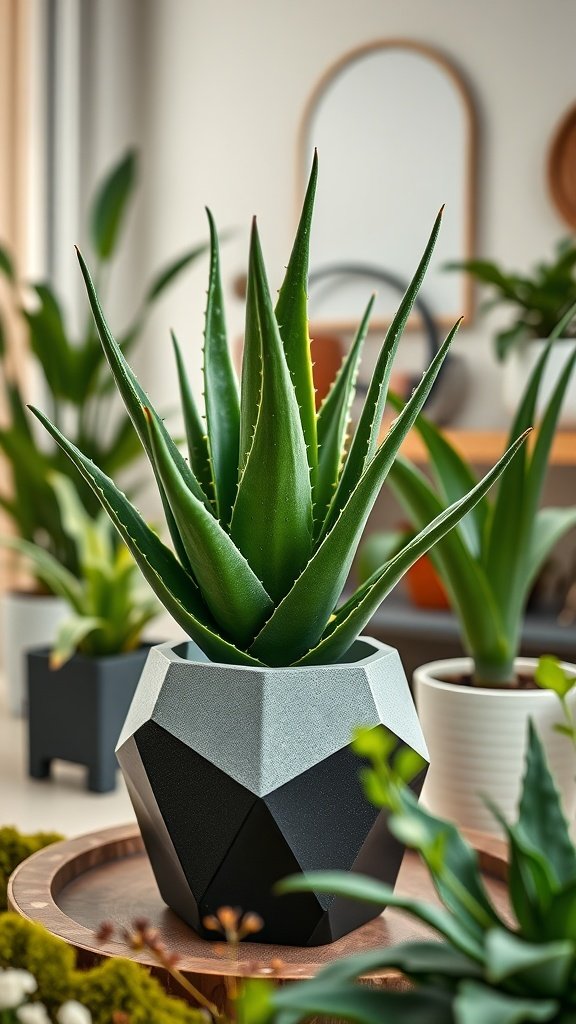
Using a geometric-shaped pot for your Aloe Vera plant not only enhances its beauty but also adds a modern touch to your indoor space. This style works well with the sleek lines of the Aloe Vera, making it a perfect fit for contemporary decor. The clean angles and unique design can bring an artistic flair to any room, blending seamlessly with other succulents and plants.
When caring for your Aloe Vera plant, ensure it gets plenty of sunlight and is not overwatered. Aloe plants thrive in well-draining soil, making succulent care quite simple. If you’re new to gardening, this setup is user-friendly and requires minimal maintenance. Alongside your stylish pot, you can enjoy the many benefits of this succulent, from its air-purifying properties to its soothing gel that can be harvested with ease.
Ingredients
- 1 healthy Aloe Vera plant
- 1 geometric pot with drainage holes
- Succulent soil mix
- Optional: decorative stones for top dressing
Instructions
- Choose a geometric pot that complements your decor and has adequate drainage to keep your Aloe Vera healthy.
- Prepare your succulent soil mix by combining potting soil with sand or perlite for better drainage.
- Gently remove the Aloe Vera plant from its original pot, being careful not to damage the roots.
- Place the plant in the geometric pot and fill around it with the soil mix, ensuring it’s secure.
- Optionally, add decorative stones on top for a polished look and to help retain moisture.
- Water lightly and place your geometric pot in a bright, indirect light location.
Glass Aloe Vera Plant Pot Idea: Grow Your Plant In A Glass Jar To Showcase Its Roots.

Growing an Aloe Vera plant in a glass jar is not just a unique decoration but also an educational experience. This method lets you admire the intricate roots and soil, creating a stunning centerpiece for any room. Plus, Aloe Vera is a resilient succulent that can thrive in various conditions, making it an excellent choice for indoor gardening.
This setup is straightforward, requiring minimal materials. The taste of Aloe Vera, while not typically eaten raw, is refreshing and can be used in smoothies, drinks, and skincare. If you’re eager to have your own Aloe plant, you can easily propagate Aloe Vera from cuttings or purchase a small plant for your glass jar.
Ingredients
- 1 Aloe Vera plant
- Glass jar (preferably wide-mouth for easy access)
- Well-draining potting soil
- Small stones or pebbles (for drainage)
- Water (for initial watering)
Instructions
- Prepare the Jar: Clean your glass jar thoroughly and add a layer of small stones or pebbles at the bottom for drainage.
- Add Soil: Fill the jar with well-draining potting soil, leaving enough room for the Aloe Vera plant’s roots.
- Plant the Aloe: Gently remove the Aloe Vera from its original pot and place it in the glass jar. Ensure the roots are spread out and covered with soil.
- Water: Lightly water the plant, ensuring not to over-saturate the soil. Allow excess water to drain.
- Place in Indirect Sunlight: Position your jar in a spot with bright, indirect sunlight. Avoid direct sunlight, which can scorch the leaves.
- Care: Monitor the moisture levels and only water when the top inch of soil feels dry. This is key in ensuring you are providing proper succulent care.
Tiered Aloe Vera Plant Pot Idea: Arrange Multiple Pots On A Tiered Stand For A Striking Display.
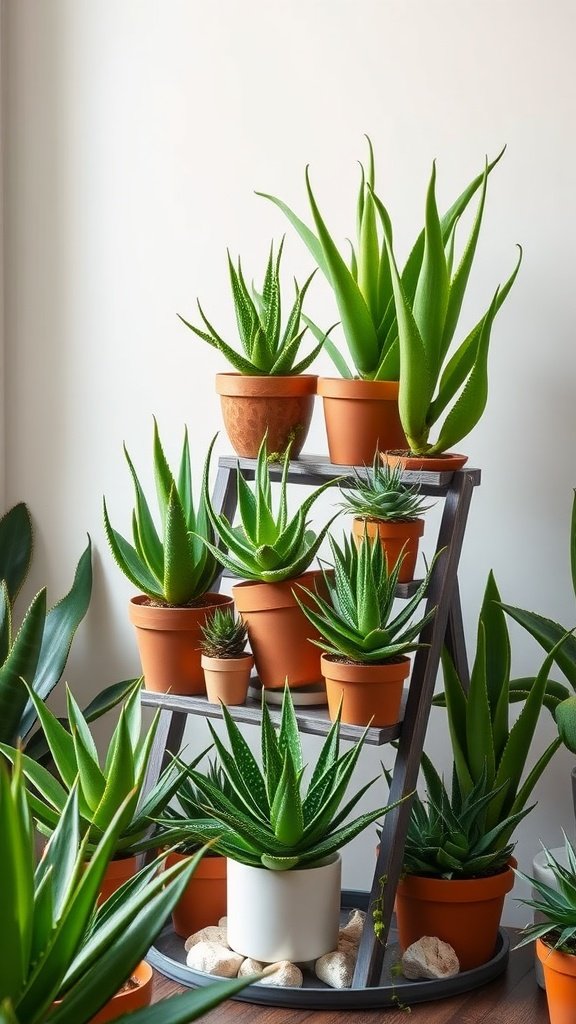
If you love the look of Aloe Vera plants, a tiered pot display can elevate your indoor garden. This simple setup allows you to showcase various sizes and types of Aloe Vera plants in a fun and visually appealing way. Plus, it’s a wonderful way to practice your succulent gardening skills while bringing a touch of greenery into your space.
These plants are not just beautiful; they are also easy to care for. With the right potting, you can enjoy the benefits of Aloe Vera, from its soothing gel to its air-purifying qualities. If you’re new to caring for Aloe Vera plants, don’t worry! With a little plant advice and some basic succulent care tips, you’ll have a thriving display in no time.
Ingredients
- 4 small pots for young Aloe Vera plants
- 2 medium pots for larger Aloe Vera plants
- 1 large pot for a centerpiece Aloe Vera
- Potting soil suitable for succulents
- Small stones for drainage
- Decorative stones for the base
Instructions
- Start by selecting a tiered stand that fits your space. Make sure it’s sturdy enough to hold the pots.
- Place small stones in the bottom of each pot to ensure proper drainage.
- Fill each pot with potting soil, leaving some space at the top for the plants.
- Carefully remove the Aloe Vera plants from their original containers and place them in the new pots. Make sure to position them at the right depth.
- Once all the plants are potted, arrange them on the tiered stand, placing larger pots at the bottom and smaller ones on top for balance.
- Finish off your display by adding decorative stones around the base for an aesthetic touch.
Succulent Garden Aloe Vera Plant Pot Idea: Combine Aloe With Other Succulents In A Single Pot.
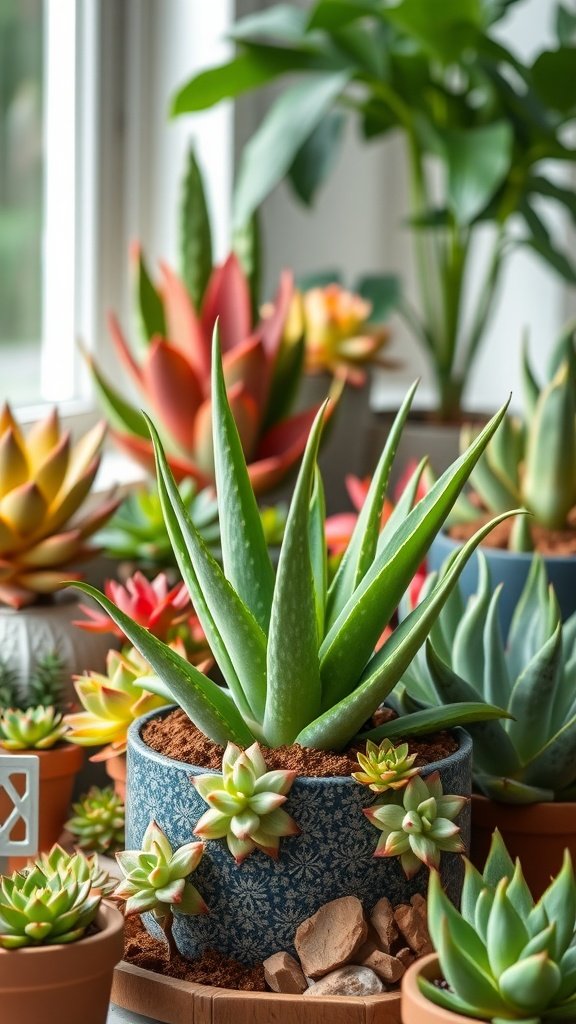
Creating a succulent garden with an Aloe Vera plant is a fun and simple way to bring life into your home. This combination not only looks stunning but also provides a variety of textures and colors. Aloe Vera is known for its medicinal properties, and when paired with other succulents, it can thrive in a shared environment with minimal care.
The taste of this plant arrangement is not applicable in the culinary sense, but the aesthetic appeal is sure to brighten up any room. The succulent garden is easy to maintain, making it a perfect project for both novice and experienced gardeners. It’s an excellent way to enhance your indoor space with low-maintenance greenery.
Ingredients
- 1 Aloe Vera plant
- 2-3 smaller succulents (like Echeveria or Sedum)
- Well-draining potting soil
- Decorative pot with drainage holes
- Small rocks or pebbles for top dressing
Instructions
- Choose a decorative pot that allows for drainage. This is crucial for healthy succulent growth.
- Fill the bottom of the pot with a layer of small rocks to enhance drainage.
- Mix the well-draining potting soil with some sand to improve aeration.
- Plant the Aloe Vera in the center of the pot, ensuring it’s secure in the soil.
- Arrange the smaller succulents around the Aloe Vera, adding soil as needed to fill in the gaps.
- Top the soil with small rocks or pebbles for a polished look and to help retain moisture.
- Place your succulent garden in a bright location, but avoid direct sunlight, which can scorch the leaves.
Hollow Log Aloe Vera Plant Pot Idea: Use A Hollowed-Out Log For A Natural, Earthy Aesthetic.
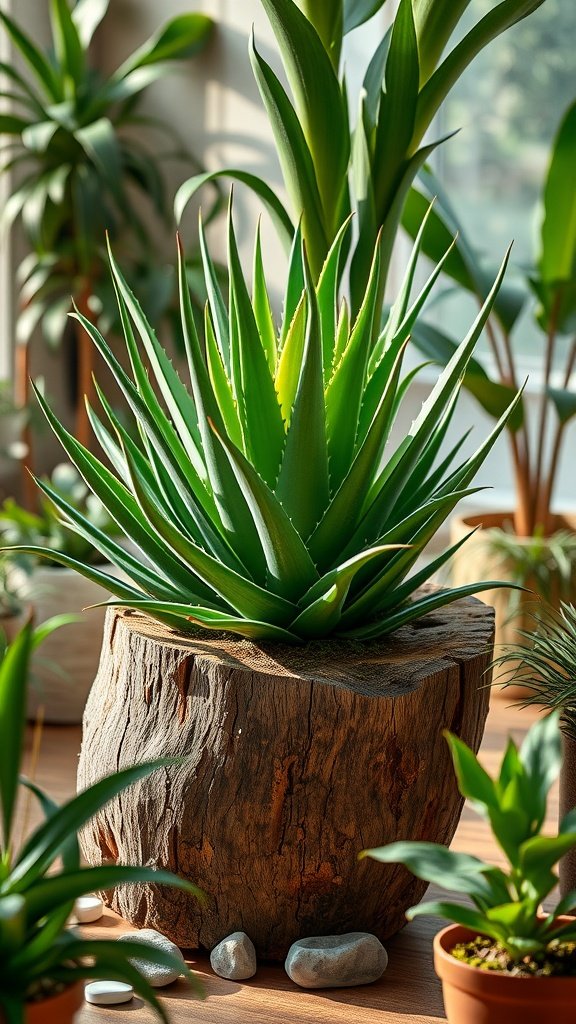
Transform your space with a charming hollow log as a pot for your Aloe Vera plant. This idea not only adds a rustic touch but also provides a cozy environment for your Aloe, promoting healthy growth. The earthy aesthetic complements the vibrant green of the Aloe, making it a perfect centerpiece for any room or garden.
Creating this pot is a simple project that requires minimal tools and is perfect for those who enjoy a bit of DIY. Just make sure your log has been properly dried and treated to prevent any pests. Pairing this natural planter with proper Aloe Vera plant care will ensure your succulent thrives, making it a delightful addition to your home.
Ingredients
- 1 hollowed-out log (ensure it’s dried and treated)
- Potting soil
- Aloe Vera plant
- Small stones for drainage
- Optional: decorative pebbles or moss for aesthetics
Instructions
- Prepare the Log: If your log is freshly cut, let it dry completely for several weeks to avoid mold.
- Add Drainage: Place a layer of small stones at the bottom of the log to help with drainage and prevent water accumulation.
- Fill with Soil: Add potting soil to the log, leaving enough space for the Aloe Vera plant.
- Plant the Aloe: Gently remove the Aloe Vera from its original pot and place it in the log. Fill in any gaps with more soil.
- Decorate: Optionally, add decorative pebbles or moss around the base of the plant for a finished look.
- Water and Care: Water your newly planted Aloe Vera lightly, ensuring it’s not overwatered. Follow general Aloe Vera plant care guidelines for the best results.
Recycled Tire Aloe Vera Plant Pot Idea: Paint An Old Tire And Turn It Into A Large, Quirky Pot.
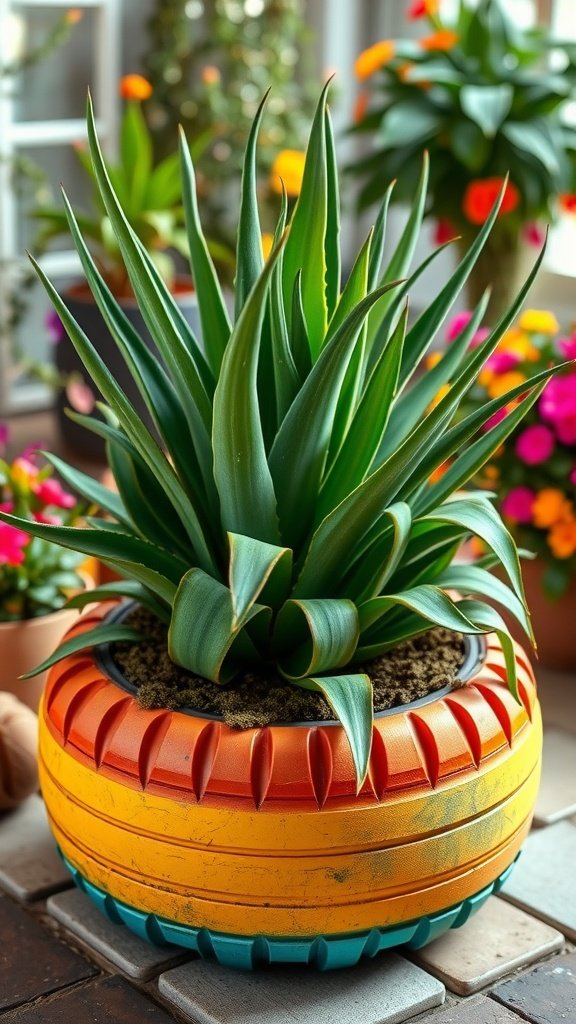
Using an old tire as a planter for your Aloe Vera plant is a fun and eco-friendly project that adds a unique touch to your gardening space. Not only does it give your plants a cozy home, but it also allows you to express your creativity through colors and designs. This idea is simple to execute and perfect for those who love DIY crafts.
To make your tire pot even more appealing, consider painting it in vibrant colors that brighten up your garden or patio. This quirky planter will not only house your Aloe Vera succulent but will also serve as a striking piece of outdoor decor. Plus, taking care of your Aloe Vera plant is straightforward with essential tips like ensuring it gets plenty of sunlight and proper drainage. Now, let’s add a tasty twist to your gardening theme by whipping up a refreshing Aloe Vera drink!
Ingredients
- 2 tablespoons fresh Aloe Vera gel
- 1 cup water
- 1 tablespoon lemon juice
- 1 tablespoon honey (optional)
- Ice cubes
Instructions
- Prepare the Aloe Vera: Cut an Aloe Vera leaf from your plant and scoop out the gel using a spoon.
- Blend: In a blender, combine the Aloe Vera gel, water, lemon juice, and honey. Blend until smooth.
- Serve: Pour the mixture into a glass filled with ice cubes. Enjoy your refreshing drink!
Color Block Aloe Vera Plant Pot Idea: Paint The Bottom Of A Pot In A Bold Contrasting Color.

Transforming your aloe vera plant pot into a stunning color block design is an easy and fun project that adds a splash of personality to your indoor garden. This simple DIY task not only makes your plant stand out but also complements your home decor. Choose your favorite bold color for the bottom of the pot to create a striking contrast with the natural terracotta or ceramic finish.
This project is perfect for those who love succulent gardening and want to personalize their indoor aloe vera plant display. After painting, just ensure to let the pot dry completely before planting to keep your aloe plant healthy. For an extra touch, you can even use patterns or stencils to give your pot a unique flair.
Ingredients
- 1 terracotta pot
- Acrylic paint in your chosen bold color
- Paintbrush
- Painter’s tape
- Clear sealant (optional)
- Aloe vera plant
- Potting mix
Instructions
- Prep the Pot: Clean the terracotta pot and ensure it’s completely dry. Use painter’s tape to mask off the area you want to keep unpainted.
- Paint: Apply your chosen acrylic paint to the bottom portion of the pot. Use multiple coats if necessary, allowing each coat to dry completely.
- Seal (optional): If you want to protect the paint, apply a clear sealant after the paint is dry.
- Plant: Fill the bottom of the pot with potting mix and carefully plant your aloe vera. Gently pat the soil around the base to secure it.
- Care: Place your newly decorated pot in a well-lit area and follow basic aloe vera plant care tips to keep it thriving.
Metallic Aloe Vera Plant Pot Idea: Spray Paint A Pot In Gold Or Silver For A Glamorous Look.
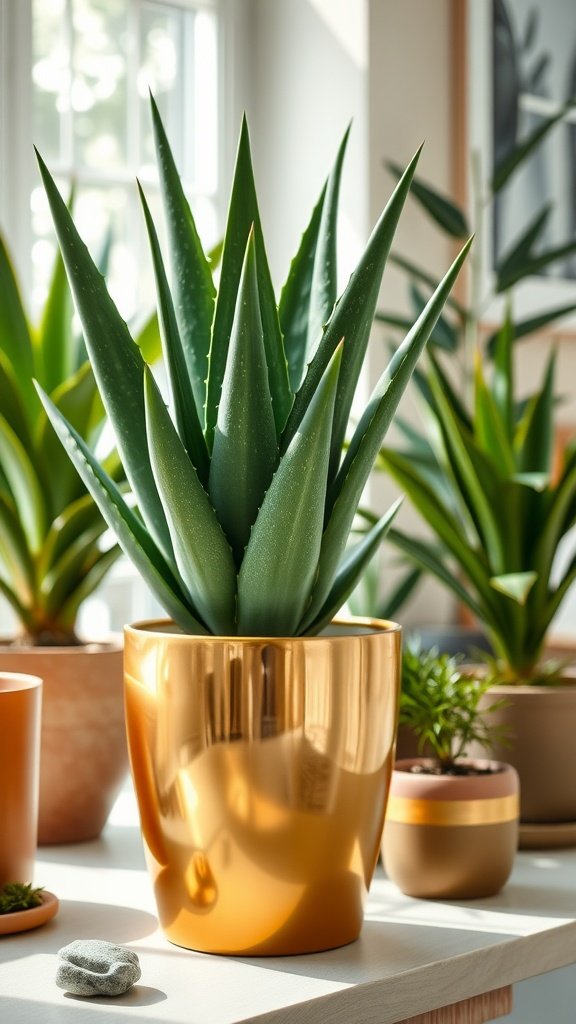
Transforming your plant pots with a sleek metallic finish can add a touch of glam to your indoor garden. Using spray paint in gold or silver is an easy way to elevate the look of your aloe vera plant. This chic update not only enhances your decor but also complements the natural beauty of the aloe’s striking leaves.
Whether you’re an experienced crafter or a beginner, this project is simple and fun. Plus, the metallic sheen reflects light beautifully, creating an eye-catching focal point in any space. After sprucing up your pot, ensure you know the basics of caring for your aloe. Healthy aloe plants thrive with minimal effort, and their gel-filled leaves can be used for soothing skin care too!
Ingredients
- 1 clean terracotta or plastic pot
- Gold or silver spray paint
- Painter’s tape
- Protective gloves
- Drop cloth or newspaper
Instructions
- Prepare the Pot: Start with a clean pot. Wipe it down to remove any dust or debris.
- Tape Off Areas: Use painter’s tape to cover any sections you don’t want painted, like the drainage holes.
- Protect Your Workspace: Lay down a drop cloth or old newspaper to catch any overspray.
- Spray Paint: In a well-ventilated area, spray the pot evenly with gold or silver paint. Hold the can about 6-12 inches away to avoid drips.
- Let It Dry: Allow the first coat to dry completely, then apply additional coats as desired for a richer color.
- Remove Tape: Once the paint is dry, gently peel off the painter’s tape.
- Plant Your Aloe: Add soil and plant your aloe vera in its new glamorous pot!
Woven Basket Aloe Vera Plant Pot Idea: Use A Wicker Basket As A Stylish Cover For The Pot.
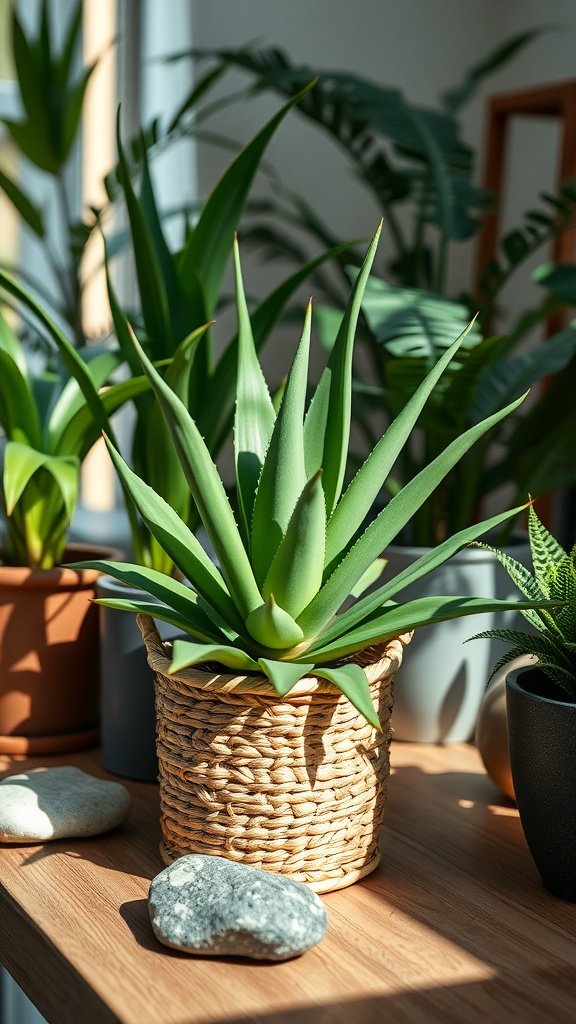
Using a woven basket as a pot cover for your Aloe Vera plant is a delightful way to showcase this hardy succulent. The natural texture of the wicker adds an earthy charm to your indoor space while providing a cozy home for your Aloe Vera. Not only does it enhance the aesthetic appeal, but it also helps maintain the right moisture levels, which is essential for Aloe Vera plant care.
This simple yet stylish idea is perfect for those who want to add a touch of greenery to their homes without overwhelming their decor. With minimal effort, you can create a lovely display that highlights the beauty of your Aloe plant.
Ingredients
- 1 Aloe Vera plant
- 1 wicker basket (sized appropriately for your plant)
- Potting soil (suitable for succulents)
- Decorative stones (optional)
Instructions
- Start by selecting a healthy Aloe Vera plant and a wicker basket that fits comfortably around the pot. Make sure the basket has no holes that could allow soil to escape.
- Carefully remove the Aloe Vera plant from its plastic pot and loosen the roots gently.
- Fill the bottom of the wicker basket with a layer of potting soil designed for succulents.
- Place the Aloe Vera in the center of the basket and fill around it with more potting soil, securing the plant in place.
- If desired, add decorative stones on top of the soil for an appealing finish.
- Water lightly, ensuring the soil is moist but not soggy. Keep an eye on the moisture levels as part of your caring for the Aloe Vera plant routine.
Animal-Themed Aloe Vera Plant Pot Idea: Paint Or Shape Pots Into Cute Animal Designs.
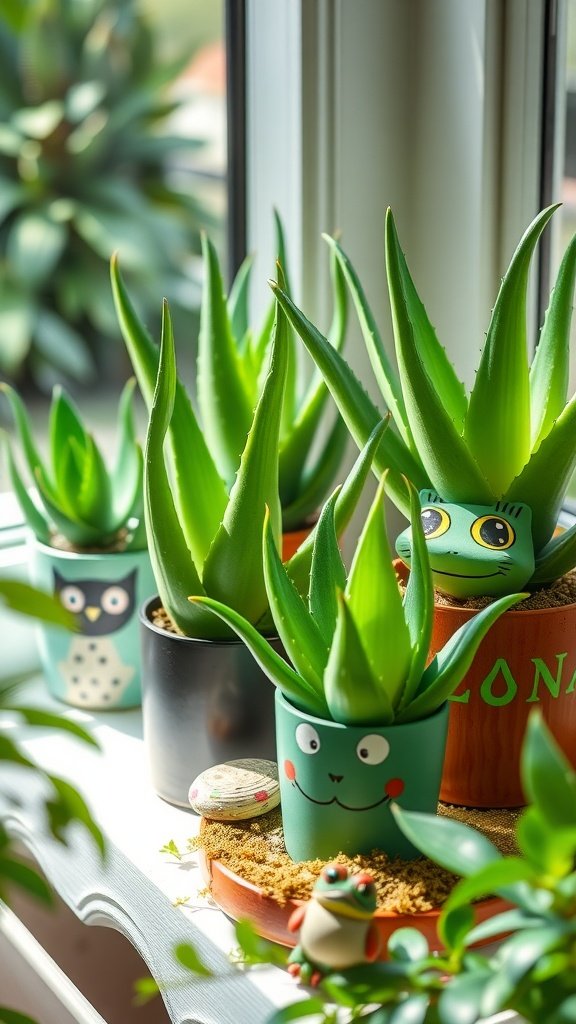
Transforming your aloe vera pots into adorable animal shapes can add a playful touch to your indoor space. This simple craft not only brightens up your plant display but also makes caring for your aloe plants more enjoyable. Whether you choose to paint them like friendly frogs or shape them into charming owls, the process is straightforward and can be done in just a few hours.
Once your pots are ready, they can house your aloe vera plants beautifully. Remember to give your aloe plants proper care, keeping in mind succulent care tips like ensuring they have well-draining soil and adequate sunlight. Now, if you want to get creative with your aloe vera plant, here’s a fun recipe for aloe vera gel that you can make using the leaves from your plants.
Ingredients
- 2-3 fresh aloe vera leaves
- 1 tablespoon honey (optional)
- 1 tablespoon lemon juice (optional)
Instructions
- Harvest the Leaves: Cut off 2-3 mature aloe vera leaves at the base of the plant. Use a sharp knife to ensure a clean cut.
- Extract the Gel: Slice the leaves lengthwise and scoop out the clear gel using a spoon. Make sure to avoid the yellowish latex that may be present near the leaf’s edge.
- Blend and Mix: Place the clear aloe vera gel in a blender. For added flavor and benefits, you can mix in honey and lemon juice. Blend until smooth.
- Store: Pour the gel into a clean jar and refrigerate. It can be used on skin or added to smoothies for a refreshing drink.
Wall-Mounted Aloe Vera Plant Pot Idea: Attach Small Pots To A Wooden Board For Vertical Gardening.
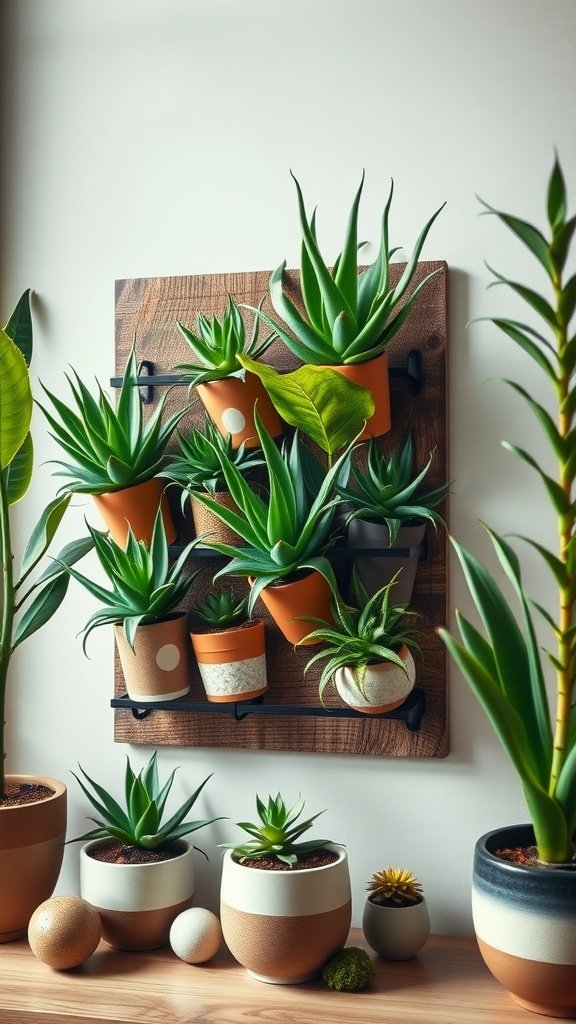
Creating a wall-mounted display for your Aloe Vera plants is a fun and stylish way to bring a touch of green into your home. This setup not only saves space, but it also adds an eye-catching element to any wall. Aloe Vera, known for its succulent leaves, is easy to care for and thrives indoors, making it a perfect choice for this project.
This vertical gardening idea is simple to execute and gives you the opportunity to showcase multiple Aloe Vera plants in a creative way. As you arrange the small pots, consider varying the pot sizes and colors to create a dynamic look. This display not only serves as decoration but also allows for engaging indoor gardening, which can be rewarding and enjoyable!
Ingredients
- 6-8 small pots (terracotta, ceramic, or any material)
- Wooden board (suitable size for your wall)
- Wall bracket or hooks for mounting
- Potting soil
- Aloe Vera plants (baby plants or cuttings)
Instructions
- Prepare the Board: Sand the wooden board if necessary and apply a coat of sealant to protect it.
- Attach the Brackets: Secure wall brackets or hooks to the board, spaced evenly apart for your pots.
- Plant Preparation: Fill each small pot with potting soil and make a small hole in the center.
- Plant the Aloe: Carefully remove Aloe Vera plants from their original pots. If propagating, ensure roots are intact. Place in the holes and gently pack the soil around them.
- Mounting: Hang the board on the wall at a desired height, ensuring it is secure. Now, you can display your beautiful Aloe Vera plants in a vertical garden!
Driftwood Aloe Vera Plant Pot Idea: Mount Your Plant In A Driftwood Piece For A Coastal Vibe.
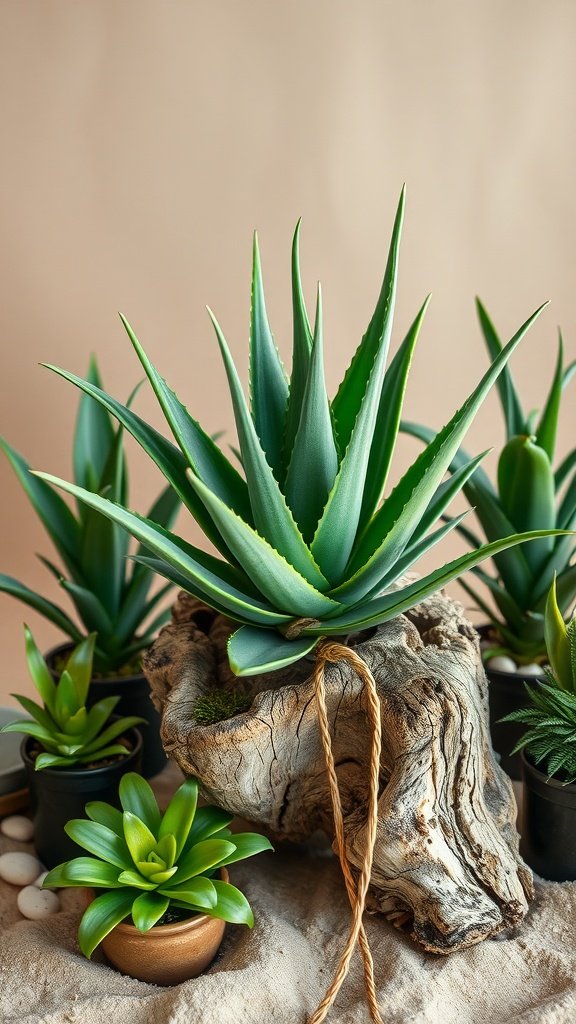
Creating a driftwood pot for your aloe vera plant is not just a fun project; it adds a unique coastal vibe to your space. This style emphasizes natural materials, giving your aloe plant a beautiful, organic setting. It’s an easy and creative way to display your indoor aloe vera, making it an eye-catching centerpiece.
To start, select a piece of driftwood that fits your aesthetic. Clean it to remove any dirt or debris, then securely mount your aloe plant in a hole or cavity in the driftwood. Once your plant is set, you only need to focus on caring for it. Remember, caring for aloe vera involves ensuring it receives proper sunlight and infrequent watering. And don’t forget, you can propagate aloe vera easily by following simple steps!
Ingredients
- 1 piece of clean driftwood
- 1 aloe vera plant (medium size)
- Potting soil (for succulents)
- Moss (optional, for decoration)
Instructions
- Choose a driftwood piece that has a natural cavity or hole where your aloe vera can fit securely.
- Remove the aloe vera plant from its pot and gently loosen the roots.
- Fill the cavity in the driftwood with potting soil, making sure it’s packed enough to support the plant.
- Place the aloe vera into the soil, ensuring it’s stable and upright.
- Optional: Add moss around the base of the plant for a decorative touch.
- Water lightly to settle the soil, but be careful not to overwater.
- Position your driftwood aloe pot in a spot that gets bright, indirect sunlight.
Reclaimed Wood Aloe Vera Plant Pot Idea: Build A Rustic Planter Box From Old Wood Scraps.
Creating a reclaimed wood planter box for your aloe vera plant is a fun and rewarding project that adds rustic charm to your indoor gardening space. This type of planter not only showcases your aloe plant beautifully but also provides the perfect drainage and environment for it to thrive. Making this planter is simple, requiring just a few tools and some old wood scraps you might have lying around.
To start, gather your materials and tools, such as reclaimed wood pieces, nails or screws, and a hammer or screwdriver. Assemble the wood into a box shape, ensuring it’s sturdy enough to hold the soil and plant. Once constructed, you can paint or stain the wood for added character. After your planter is ready, it’s time to plant your aloe vera. This succulent is low-maintenance and thrives well indoors, making it an ideal choice for your new rustic planter!
Ingredients
- 1-2 mature aloe vera plants
- Potting soil suitable for succulents
- Reclaimed wood for the planter
- Nails or screws
- Wood stain or sealant (optional)
Instructions
- Construct the Planter: Cut your reclaimed wood into planks. Arrange them into a box shape and secure with nails or screws.
- Prepare the Soil: Fill the bottom of the planter with small stones for drainage, then add potting soil for succulents.
- Plant the Aloe: Remove the aloe vera from its original pot and gently place it in the new planter, filling around the roots with soil.
- Water Sparingly: After planting, water lightly and avoid over-watering, as aloe prefers drier conditions.
- Place in Indirect Light: Set your new planter in a spot with plenty of indirect sunlight for optimal growth.
Terrarium Aloe Vera Plant Pot Idea: Place Your Plant In A Glass Terrarium For A Chic Centerpiece.
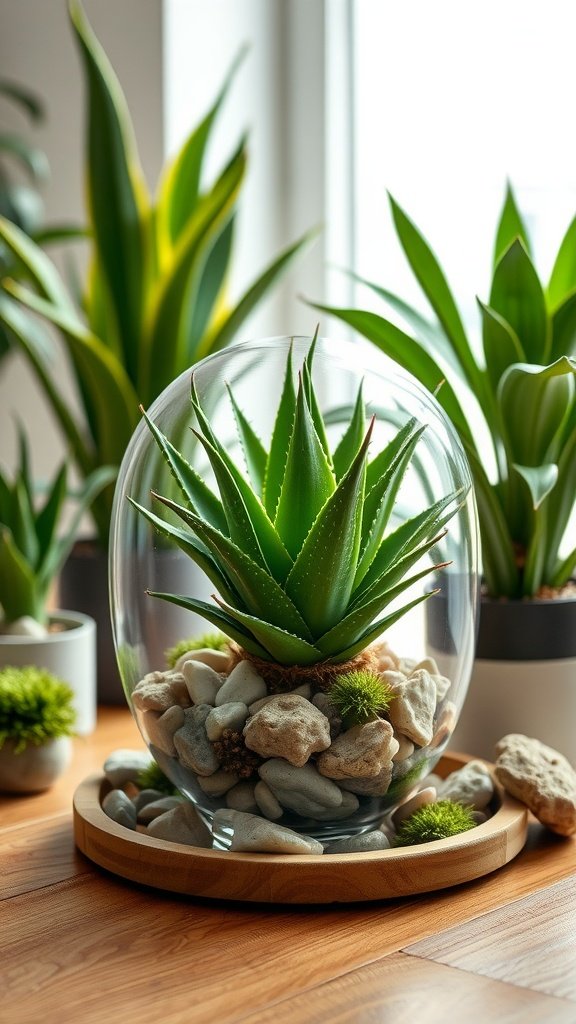
A glass terrarium is a stylish way to showcase your indoor aloe vera plant. This arrangement not only adds a modern touch to your home decor but also provides optimal growing conditions for your succulent. Aloe vera thrives in well-drained soil and requires minimal care, making it perfect for both beginner and seasoned plant lovers.
Creating a terrarium is simple and fun! Start with a layer of small rocks for drainage, followed by a mix of potting soil specifically designed for succulents. Then, place your aloe vera plant in the center and add decorative stones or moss around it. This way, your terrarium becomes a chic centerpiece that draws attention and adds a pop of greenery to your space.
Ingredients
- 1 glass terrarium
- Small rocks (for drainage)
- Succulent potting soil
- 1 healthy aloe vera plant
- Decorative stones or moss
Instructions
- Prepare the Base: Start by adding a layer of small rocks to the bottom of your glass terrarium for drainage. This helps prevent overwatering.
- Add Soil: Pour in succulent potting soil, leaving enough space for your aloe vera plant. Make sure to pack it down gently.
- Plant the Aloe: Remove the aloe vera plant from its pot and place it in the center of the terrarium. Fill in any gaps with more soil.
- Decorate: Add decorative stones or moss around the base of the plant to enhance the aesthetics of your terrarium.
- Water Sparingly: Give your aloe vera a light watering, but be cautious not to overwater as this plant prefers drier conditions.
Bright Neon Aloe Vera Plant Pot Idea: Paint A Pot In Neon Colors To Make A Bold Statement.

Creating a bright neon aloe vera plant pot is an easy and fun way to add a splash of color to your space. This project is perfect for those looking to showcase the beauty of the aloe plant while making a bold statement in their decor. Just a few coats of neon paint can transform a simple pot into a vibrant centerpiece that draws attention and cheers up any room.
To get started, gather a few basic supplies: a terracotta pot, neon paint in your favorite colors, and a paintbrush. The painting process is straightforward, allowing even beginners to create a stunning result. Once your pot is painted, plant your aloe vera and watch it thrive. Remember, caring for your indoor aloe vera plant is essential in ensuring it remains healthy and vibrant.
Ingredients
- 1 terracotta pot
- Neon acrylic paint (various colors)
- Paintbrush
- Sealant (optional)
- Aloe vera plant
- Potting soil
Instructions
- Prepare the Pot: Clean the terracotta pot thoroughly and let it dry. This ensures the paint adheres well.
- Paint the Pot: Using your paintbrush, apply a base coat of your chosen neon color. Allow it to dry completely before adding additional layers or designs.
- Add Designs: Once the base color is dry, you can create fun patterns or designs using contrasting neon colors. Let your creativity flow!
- Seal the Paint: If desired, apply a sealant to protect the paint from scratches or fading.
- Plant the Aloe Vera: Fill the pot with potting soil, place your aloe vera plant in, and gently pack the soil around it. Water it lightly.